There are scenarios under which the location someone is trying to access your SharePoint Online sites from is more important than that user’s specific access. Maybe you’re extra worried about Russian hackers gaining access to a specific SPO site, or maybe your organization doesn’t want users in France accessing a site you have setup for users in the US.
Your specific use case aside, I’m going to show you how to block access to a SharePoint Online site from specific countries, even for users who would have access to that site from other countries.
Licensing
This is an E5 feature. I believe you can also get this to work with a SharePoint Advanced Management license, but I have not verified that.
I think it’s possible to get this to work with one E5 license, but that would clearly violate Microsoft Terms of Service Agreement which says that every user who takes advantage of E5 features needs to have an E5 license to use those features, even if those features can be set up by a single admin with a single E5 license.
I’ll leave it to you and your legal team to figure out the licensing for this feature.
Conditional Access FTW!
I’m a huge fan of Conditional Access. There is a lot more information passed from your computer into Entra when you log in besides your username and password. Conditional Access gives us the ability to use that information to grant or restrict access to all sorts of resources within M 365.
This solution goes a bit beyond a Conditional Access policy and adds a new layer called “Authentication Contexts”.
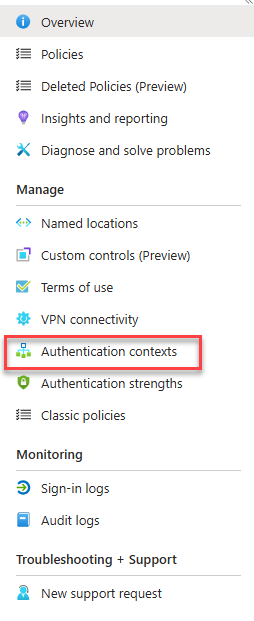
Adding an Authentication Context
The first thing we need to do to get this to work is to add an Authentication Context. This step is so simple that it’s confusing.
Navigate to Authentication contexts in the Entra CA portal and click to create a new one.
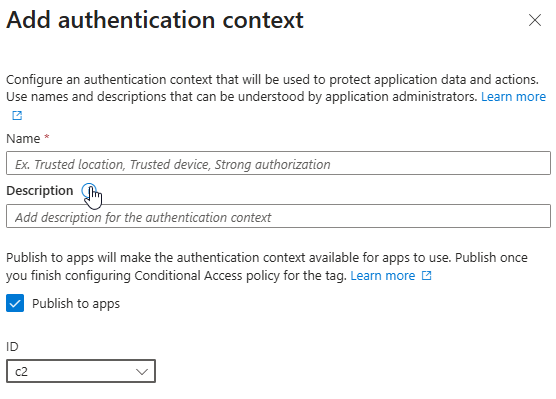
Give your new context a name, description, and select an ID from the drop down. You can have up to 99 Authentication contexts in your tenant before you run out of those Identifiers.
Select the “Publish to apps” check box and you’re done here. I’m not really sure of the reason that check box is there as it doesn’t hurt anything to publish this now (as far as I know).
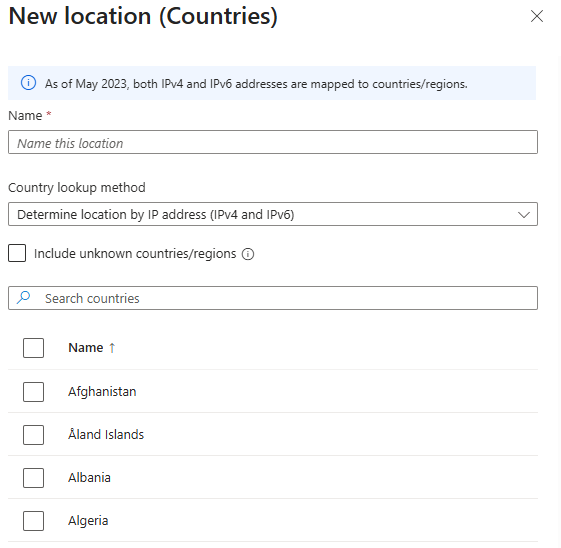
Add a Named Location
The next step is to add a named location. This is going to be the countries from which users should not be able to access your SPO site. Nothing complicated here, right?
Create a Conditional Access policy
This is the hard part. Conditional Access is very powerful but can be confusing to use.
BE CAREFUL HERE.
I strongly recommend testing this out with one user and a SharePoint Online site you don’t care about.
Name your policy and make the following settings.
Users > Select who this policy will apply to. I strongly recommend starting out with one user (not the account you’re using to set this up please).
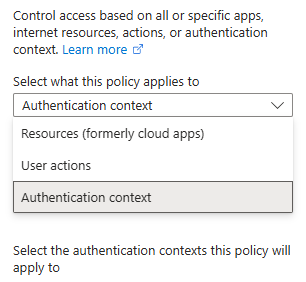
Target resource > Select “Authentication context” from the pull-down menu (This is new as of this writing. Microsoft documentation doesn’t currently reflect this menu). Then select the Authentication context you created earlier. If this is your first time using this feature, there will only be one choice.
Network > Select Configure yes, and under Include select “Selected networks and locations”, then under the select section choose the network location you setup in the last step.
Conditions > I’m a little unsure about this part. It seems redundant to me, but this is how I currently have it working. It feels like this part will change over time.
Under conditions > Locations I selected Yes to configure, the Selected networks and locations and under select choose the same network location you used in the last step.
Again, this seems redundant to me. I’m not sure this is necessary. I expect the Network tab will replace the Locations under Conditions eventually.
Access Controls > Grant Select block access.
That’s it for the Conditional Access policy. You may want to tweak some of those settings to more closely match your requirements, but those settings work for me.
Apply the Authentication context to the SharePoint Online site
The last step in the process is to apply the new Authentication context to a SharePoint Online site. This is a PowerShell configuration, and you’ll need the SharePoint Online PowerShell module.
Once you’re connected to SharePoint Online via PowerShell, run the following command
Set-SPOSite -Identity https://contoso.sharepoint.com/sites/research -ConditionalAccessPolicy AuthenticationContext -AuthenticationContextName "Sensitive information"Change the site name and the Authentication context in quotes to match your environment.
As far as I can tell, you cannot see what Authentication context is applied to a site later. The PowerShell command Get-SPOSite will show you the attribute “Conditional Access Policy”, which will be set to “AuthenicatonContext”. I’m not able to find anything that tells me what Authentication context you have assigned to a site. Hopefully that will be added someday soon.
How do I know that worked?
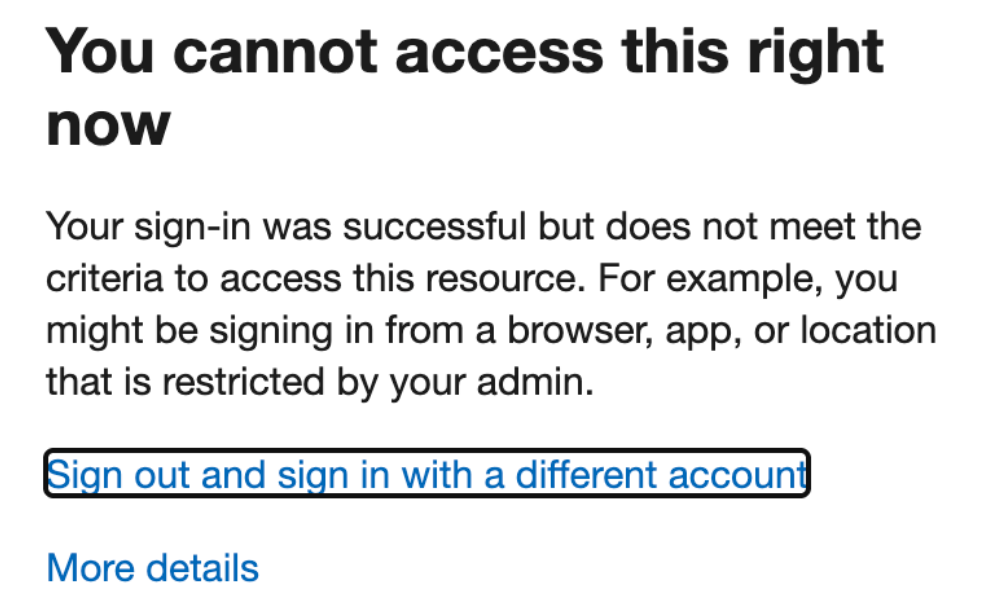
When I first set this up, I applied it to a single user, set the network location to US, applied this to a totally new SPO site, granted that user access to the SPO site, then verified that user is blocked. If the user is block, you should get this error when trying to access that SPO site.
Wrapping it up
There are some significant limitations to this setup. Microsoft lists known technical limitations HERE. Beyond those, it’s easy to use a VPN with an egress point in a different country. Don’t think of this as solid security, but as a nice helper on the path to better security.
While this isn’t a perfect solution, it looks to me like it can be very helpful. I’m using it, hopefully this can solve some problems for you too.